CSA week 14

Beets with cut Chioggia Beet

Beets with cut Chioggia Beet

CSA week 14, this is what we hope to bring you:

Regular Share
-Melons
-Chioggia Beets
-Little Storage onions
-Yukon Gold Potatoes
-CHOICE: Peppers OR Basil
-CHOICE: Red Tomatoes OR Beans

Large Share Additions
-Extra Melons
-Red Tomatoes AND Beans
-Extra Yukon Gold Potatoes
-Lettuce
-Eggplant

Fruit Share
-Peaches
-Plums

Beets

Beets

Posted in 2016, Farm, Newsletter | Comments Off on CSA week 14

Onions-Different Types for Different Uses

IMG_2897.JPG

So many different alliums! How are they different and how do you use them to their best advantage?

Let’s start with young onions, or what we at Red Wagon call ‘grilling onions’ vs the storing onions we are starting to see at the CSA pickup.

Grilling onions are just young thin-skinned onions. We harvest them while they are still developing so they are mild, sweet and tender. You can eat them raw and they will be mild and crisp. If you grill them they are not too bold in flavor. Grilling onions will only store for a week or two in the refrigerator. They are not storing onions.

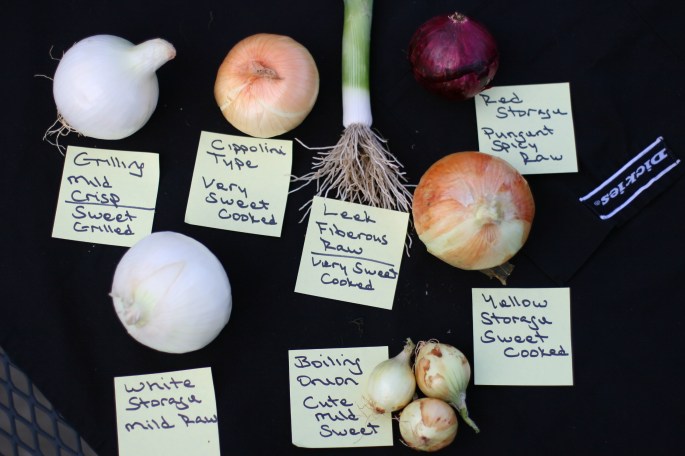
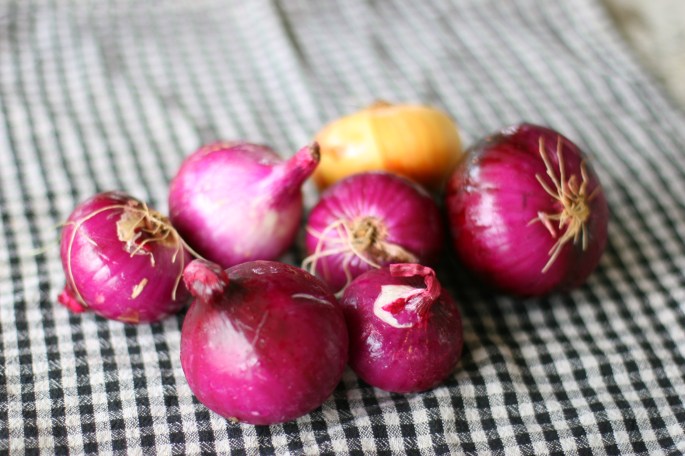
Look at the stems of these three onions, the stem of an onion tells us their story.IMG_2905

The first onion is a Grilling/Young  Onion, Second a Storage Onion and third is a storage onions still curing. Look at the stem on the onion on the left. It is fat and the rings of the onion are exposed to air. This onion will not store for long but will be delicious for a week or two. The middle onion is a storage onion. This onion has been harvested and properly cured/dried so the stem dries and closes around the onion providing natural protection so this onion will store for months in a cool dry spot. The onion on the right is a storage onion still being cured.See how the onion skin is drying and closing around the stem? You can see how the papers of the onions’ job is to dry and shrink around the bulb of the onion to protect it for long storage. In a few more days this onions’ stem will be dry and shrink and close the stem around the bulb to protect it for long storage.

These three onions are pretty similar, right? Clearly meant to be storage onions.

IMG_2909

Let’s cut them open and see what is going on.

IMG_2917

Go back and look a the picture of the uncut onions again. Look how the onion stem on the left* is sort of flat and open, the middle is seemingly dry and closed, and the last is dried and shriveled up high, but firm against the top of the bulb of the onion. All of the skins look pretty good though.

When cut open, it is easy to see how, and why, middle onion and the onion on the right were cured properly and will store well. If I had these onions in my pantry I would obviously throw away the onion on the left and use the middle onion first, then the onion on the right last.

Phew. Was that too much info?

I’ll give my short answer when I’m asked ‘what is the difference between red, yellow and white storage onions’.

IMG_2922

Yellow onions are an all purpose onion. They are great for cooking, not too pungent and are sweet enough to caramelize when cooked. Raw they have a more assertive/pungent onion flavor than white onions and they can be less crisp than white onions. I try to save yellow onions for cooking.

I like to use white onions if I am making something raw, like salsa, or a sandwich. You can cook with them, but they aren’t as sweet as yellow onions and many times if you are trying to ‘brown’ your onions you will burn a white onion because it doesn’t have the natural sugar that yellow or red onions have. If you need to brown an onion and only have white onions add a pinch of sugar and you should get it to brown OK, and not burn.

Red onions are obviously very pretty raw. They taste similar to yellow onions raw and cooked. They are pungent/assertive raw and have nice assertive but sweet ‘onion’ flavor cooked.The color gets a little washed out when you cook them, so I usually save my red onions for using in raw dishes.

We will talk about leeks and boiling onions in another blog post.

If you have any questions, email me or leave a comment below in the comment section.

Have a great week.

Mo

*It took me about 10 minutes to find an onion that wasn’t curing properly from literally TONS of onions we have harvested this year. 99% of our storing onions, the onions you will get, will be cured properly and will keep (if you store them in a cool dry place) for  months. I just wanted to get the concept across of how an onion cures and what it looks like when done properly. I hope these pictures do that.


Posted in 2016, Onions and Leeks, Recipes, Storage and Preparation | Comments Off on Onions-Different Types for Different Uses

CSA week 13

Jalapeno Peppers

Jalapeno Peppers

This week we hope to bring you:

Regular Share
-Melons
-Potatoes
-Carrots
-CHOICE: Tomatoes OR Green Beans
-CHOICE: Little Storage Onions OR Zucchini
-CHOICE: Peppers OR Eggplant

Large Share Additions
-Two Melons
-BOTH: Little Storage Onions AND Zucchini
-BOTH: Peppers AND Eggplant
-Mixed Basil

Fruit Share
-Peaches

Eggplant

Eggplant

Bell Peppers

Bell Peppers

Posted in 2016, Farm, Newsletter | Comments Off on CSA week 13

Quick Pickled Onions and Pickled Onion Potato Salad

We have a bumper crop of onions at the Farm this year. Let’s use some of them up and make a quick refrigerator pickle.

IMG_2874
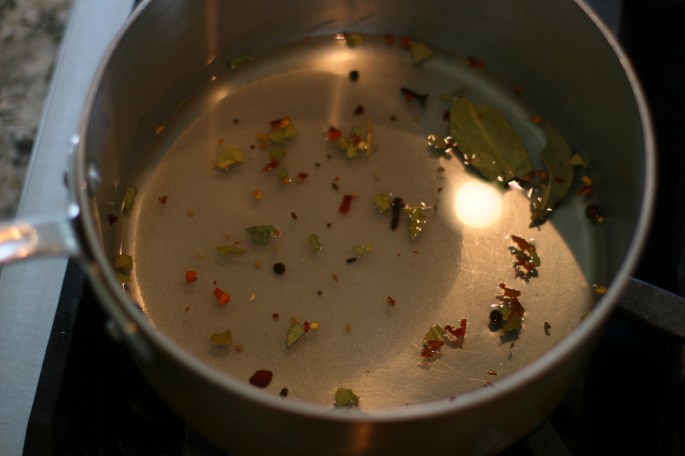
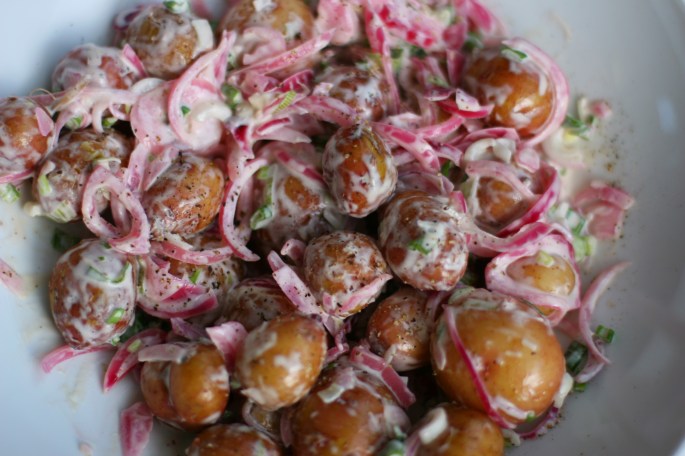
This is a super simple pickle to make with only a few ingredients. A lot of refrigerator type pickles are hard for me to get a good balance of acid, sweet, and spice. I almost always find them too acidic and when I try to balance too much acid with something sweet, I never seem to get it right.

The ratios I used for this pickle are from a David Lebovitz recipe here except for the onion amount. I doubled the onions (I didn’t double anything else) and followed the rest of the recipe. I think these are the best, easiest, quick pickled onions I have made.

Start with your vinegar, sugar and whatever spices you  want to use and boil the mix until the sugar dissolves. 3/4 cup vinegar and 3 tablespoons of sugar and I added some pickling spices and crushed red pepper.

IMG_2875

Chuck in your sliced onions and bring all of it to a boil for about a minute.

IMG_2876

That’s it….done. The 7 onions I used made exactly one quart. Let that cool, put it in a jar in your refrigerator and eat it with just about everything.

IMG_2881

IMG_2885

I made a really nice potato salad with some of those cute little potatoes we got this week. I cooked potatoes and added sour cream, a little Dijon mustard, scallions and some pickled onions.

IMG_2887

IMG_2892

Everyone really liked this. Have a great week. Let me know what you  are making with your CSA vegetables when I see you at the pickups!

Mo


Posted in 2016, Onions and Leeks, Potatoes, Recipes, Salads-Spring-Summer | Comments Off on Quick Pickled Onions and Pickled Onion Potato Salad

Chimichurri

I have made this twice in the last two weeks. I have been putting it on everything. Grilled or raw vegetables, grilled meat, any grains or legumes, sandwiches, eggs, Mexican food…really anything. It is fresh and tangy and fast and easy to make and it keeps for at least a week in the refrigerator. Though, mine only lasted a few days.

Here is what you need. We got almost everything to make this in our last CSA share!

IMG_2866

  • 1 bunch of parsley, not the stems
  • a clove of garlic peeled
  • 3/4 cup of olive oil (I didn’t take a picture of that:)
  • 1/4 cup of vinegar, I used red wine vinegar this time, last batch I used white balsamic and it added a bit of sweetness to the chimichurri
  • juice of a lemon, give or take. Use 1/2 the lemon and see if you want more after you mix it up
  • a red onion, chopped
  • I had a jalapeno I threw in, it doesn’t need it, but it added a nice heat to the sauce
  • other herbs, if you like. I had some oregano I used, you  could use basil, or thyme, or pretty much anything you have
  • salt and pepper

Now you just throw it all in the food processor and whiz it up.

IMG_2867

IMG_2870

That is it. That is delicious.  It tastes like a summer garden. I had chimichurri with leftover rice and eggs for breakfast and mixed it in tomatoes for dinner last night.

I hope you try it!.

Mo


Posted in 2016, Herbs, Recipes | Comments Off on Chimichurri

CSA week 12

Here’s what we hope to bring you this week:

CSA pick up

CSA pick up

Regular Share
-Garlic
-Beets
-Carrots
-Onions
-Potatoes
-CHOICE: Melon OR Tomatoes
-CHOICE: Zucchini OR Bunched Greens (Kale, Collards, Chard)

Large Share Additions
-Extra Potatoes
-Japanese Eggplant
-Peppers
-Lettuce

Fruit Share
-Peaches

Posted in 2016, Farm, Newsletter | Comments Off on CSA week 12

Crispy (creamy inside) Roasted Potatoes

IMG_2998

I could eat just these for dinner and nothing else. The leftovers are great for making hash browns, so make more than you need for one meal. You will be very happy you did.

The key to making great roasted potatoes, not just good roasted potatoes is par boiling your potatoes before roasting them. Boiling the potatoes before roasting keeps the inside of the potato creamy and light. Roasting without boiling first will produce a dry potato, more like a baked potato. I saw this  and used it as a jumping board for making this version, I like better. Hope you like it too.

For crispy creamy roasted potatoes you will need;

  • 1 to 2 pounds of potatoes. You can use any kind. Just cut them into pieces about as big as a golf ball.
  • some oil in an oven proof pan
  • Parmesan cheese, or you can use bread crumbs, or really just oil if you like. The potatoes won’t be as crispy, but they will still be great.
  • Salt, pepper and any herbs. I used some garlic and rosemary.

Put some salted (use plenty of salt, your water should taste like the ocean) water on to boil and pre-heat your oven to 400F.
While the oven is heating up boil the potatoes for 10 minutes. I didn’t take a picture of that, you know what boiling potatoes look like, right?

Next film an oven proof pan with oil. I used olive oil, but use what you like.

IMG_2980

Sprinkle some Parmesan cheese and any herbs you  have on the bottom of the pan.

IMG_2982

After you potatoes have been boiling for 10 minutes drain them and cut them so they fit in the pan. I didn’t cut the small ones and a few of the bigger ones I smooshed and some I cut into thirds, so they all were about the same size in the pan. Brush the tops with a little oil and salt and pepper. When the oven is hot cook the potatoes for about 35 to 40 minutes.

IMG_2985

They look like this when they are done. Sort of wrinkly. Pretty unimpressive at this stage huh?

IMG_2986

But just wait, let them sit for about 5 minutes before you take them out of the pan, or the ‘crispy’ bottom will stick to the pan and not your potato, and all your patience and hard work will be for nothing. Test a corner before you remove them. Bingo.

IMG_2990

I like to dip them into ketchup, Sriracha, and mayo…equal parts.

IMG_2996

Swoon and enjoy.

Hope you make enough to have some leftovers for hash-browns. You will be so glad you did.

Mo


Posted in 2016, Potatoes, Recipes | Comments Off on Crispy (creamy inside) Roasted Potatoes

CSA week 11

Sunrise at Teller

Sunrise at Teller

This week we hope to bring you:

Regular Share
-Parsley
-Beets
-Carrots
-Onions
-Potatoes
-CHOICE: Squash Blossoms OR Zucchini OR Cucumber
-CHOICE: Kale OR Collards

Large Share Additions
-Extra Potatoes

CSA share

CSA share

-Eggplant
-Kohlrabi

Fruit Share
-No fruit (scheduled gap in fruit share)


Potatoes

Potatoes plants (from May)

Posted in 2016, Farm, Newsletter | Comments Off on CSA week 11

Carrots with Coconut Butter and Lime

Wyatt met Deborah Madison at the Farmer’s Market a year or two ago, how cool is that? It’s a great story ask him about it sometime.

I haven’t met her, but I do feel like I know her. I have read, and reread Vegetable Literacy and Vegetarian Cooking for Everyone so many times I feel like the books are good friends. Her writing and inspirational use of vegetables speak to my heart, as a grower and an eater.

This ‘recipe’ is from her book Vegetable Literacy and is barely a recipe. It is mostly a great idea and inspired combination of flavors. You boil some carrots and  toss the cooked carrots in coconut butter and lime. That’s it. But, the combination of coconut butter, carrots and lime are completely delicious and worth adding to your repertoire. Add some nuts or mint, or basil, or parsley if you have it, or just enjoy this very simple preparation and let the beautiful carrots shine.

IMG_2852

Start with about a pound of carrots, a lime and some coconut butter.
Put a pan of water on to boil.
Wash and slice the carrots.
When the water is boiling put the carrots in with some salt and boil the carrots for about 5 to 8 minutes or until the carrots are tender.
Drain the carrots and toss the warm carrots in about 2 tablespoons of coconut butter, then squeeze the lime over the carrots. I used 1/2 a lime, taste it and add salt and more lime if you like.

IMG_2860

I had some macadamia nuts I added. After tasting this I think almond butter would be good too if you don’t have coconut butter.

Thanks Ms Madison for a simple tasty dish.

Mo

Posted in 2016, Carrots, Recipes | Comments Off on Carrots with Coconut Butter and Lime

CSA week 10

Carrot Couple

Carrot Couple

Here is what we hope to bring you:

Regular Share
-Basil
-Fennel
-Squash Blossoms
-Beets
-CHOICE: Carrots OR Kale OR Chard OR Collards
-CHOICE: Onions OR Scallions

Large Share
-Extra Basil
-Carrots AND CHOICE Kale OR Chard OR Collards
-Zucchini
-Japanese Eggplant

Fruit Share
-No fruit (scheduled gap in fruit share)

Beets

Beets


Squash Blossom Posy

Squash Blossom Posy

Posted in 2016, Farm, Newsletter | Comments Off on CSA week 10